Saturday, February 18, 2012

The things I learned

I spent a couple of weeks weaving a pair of wicklebander recently. These are the Viking version of ace bandages, except not particularly stretchy. Puttees, really, except who knows what those are these days? Anyways, they are long, narrow bands that you wrap around your leg from the knee to the ankle (or the ankle to the knee), over your pants. They keep the snow off your pants and the icy winds from blowing up your legs.


They were something of a challenge for me to weave. They are pretty long -- I was aiming for 4 yards per band. They're only 3 1/2 inches wide, but 8 yards of fabric is 8 yards no matter how narrow. And the warp is sett at 30 epi, which is much finer than anything I've woven on a loom before.

Because of the fine sett and longish warp, I decided I needed to warp back to front. I have Peggy Osterkamp's second book on warping, and have warped from the back once before, but really I didn't remember anything about it. And of course I was trying to do this as quickly as possible, in order to enter the bands in this year's Kingdom Arts & Sciences competition. So I would skim the book, do the next step, skim some more, figure out what I should have been doing in the previous step, fix it, etc., etc. It turned out pretty well, though. I especially liked the way I could easily spread the threads and heddles out while I was threading; they weren't crammed into their 30 per inch closeness until I put them through the reed. And I sure don't miss the headaches I know I would have had, trying to keep track of three ends per dent.

I made a couple of mistakes. When I was threading, I had four threads at the end. I chose to put all four through one slot in the reed, which crowded the selvedge and made it hard to pack the weft down. After about six inches I cut those threads and threaded repair threads two to a dent. What a difference that made! In fact, I could say that about so many things -- I fixed a lot of small problems and each one made a big difference. Usually I just put up with nuisances, but knowing that I had yards and yards of weaving ahead of me made it seem too foolish to do that.

I had decided to use a skeleton tie-up mentioned in Osterkamp's book -- you tie shaft 1 to the outside left treadle, 3 to the second one in, skip the middle two treadles, then shaft 4, and finally shaft 2 to the outside right treadle. This worked out very well. You "walk" a twill -- left foot on 1, right foot on two; move left foot to three for 2,3; move right foot to four for 3,4; move left foot to one for 4,1. By the time I'd woven a yard, I could do this without thinking. I always moved the foot towards which the shuttle was headed, which made it almost automatic. And raising one shaft at a time meant that the warp didn't stick; I never had to clear a shed. I will definitely continue to use this tie-up.

But at first I had trouble with my brake suddenly releasing. I realized that because I had only one shaft tied to each treadle, the treadle went down further; the lamms were pressing on the brake pedal and releasing the cable. For about a yard, I was very very careful about how far I pressed the treadle, but that seemed more and more foolish as I went on. So I lengthened the cord on the brake pedal, which took about 20 seconds. I think actually that I should have done this years ago, as it made the brake much easier to operate.

Later on I realized that my hips, knees, and ankles hurt after a weaving session because my chair was too low. I stuck a big book underneath my chair pad (Beyond Craft : the Art Fabric is the perfect size) and the difference was astonishing. Paying attention to ergonomics really paid off.

The other big mistake I made was during beaming. I'm not sure, but I think that at one point when I was tightening the warp I just forgot to tighten one of the edge bouts. As I was weaving along about four yards in, suddenly one selvedge was very loose. I weighted those threads which worked fine for a while, but I could see that the loose threads were sagging. Since I had another four yards to go, I worried that the loose threads would become more and more difficult to tension separately. My warp was superwash, and since that affects resilience, I didn't think I could count on any recovery between weaving sessions.

So I decided to end my piece of cloth at what I thought was the midpoint of the warp -- I had been measuring carefully all along, and I was right at four yards. I hemstitched the cloth, and then fixed the tension by weaving in some sticks and pulling up the loose warps. I wove a header, fiddled with the tension some more, and started the second band.

This worked pretty well. I still had some issues with looseness; almost every time I advanced the warp, I pulled the edge six threads forward a little bit with pins and fastened them into the web. And I kept a very close eye on the fell, making sure it wasn't curving up on that side. If I saw any hint of curve, I wove a pick or two a little more gently, but with the beater a little heavier on that side. That compressed the weft on that edge but let it fill out more on the rest of the cloth. And any time I added a new bobbin, I overlapped the wefts so that there was essentially an extra row everywhere but on that iffy bout of threads on the right. All these things together let me keep weaving a nice, even cloth; they did slow me down, though.

As an odd side effect, my selvedges improved dramatically on this second cloth. I think it's partly because of all the care I was taking, and partly because I had re-read several book sections and websites about even selvedges. I found the Glimakra FAQ especially helpful: everything in there is about boat shuttles. This made me realize that all the rules I know are for people using boat shuttles; maybe they didn't apply to my stick shuttle. So I abandoned the one about never touching the selvedge. Also I paid a lot of attention to how & where & at what angle I should bubble the weft.

As it turned out, I was right at four yards when I finished off the first band, but that wasn't the center of the warp. I had used more warp than I realized experimenting with wefts at the beginning, and despite being as parsimonious as I could be, I used about six inches splitting the two bands. So my second piece of cloth was only 10 1/2 feet. I like the 12 foot length much better; it's much easier to wrap it. But I like the actual cloth of the second band better -- it's more flexible, because I wasn't beating as hard, and of course it has better selvedges. It's also a different color, because with fewer picks per inch, more of the warp shows. Ah, well.

All in all, I think this was a successful project. I sure learned that details matter, and that fixing problems is much better than just accommodating them. And I want to do more back-to-front warping. But I want to get the high castle attachment for my loom, so that I can suspend the cross from it instead of using my Cendrel inkle loom / warping board:


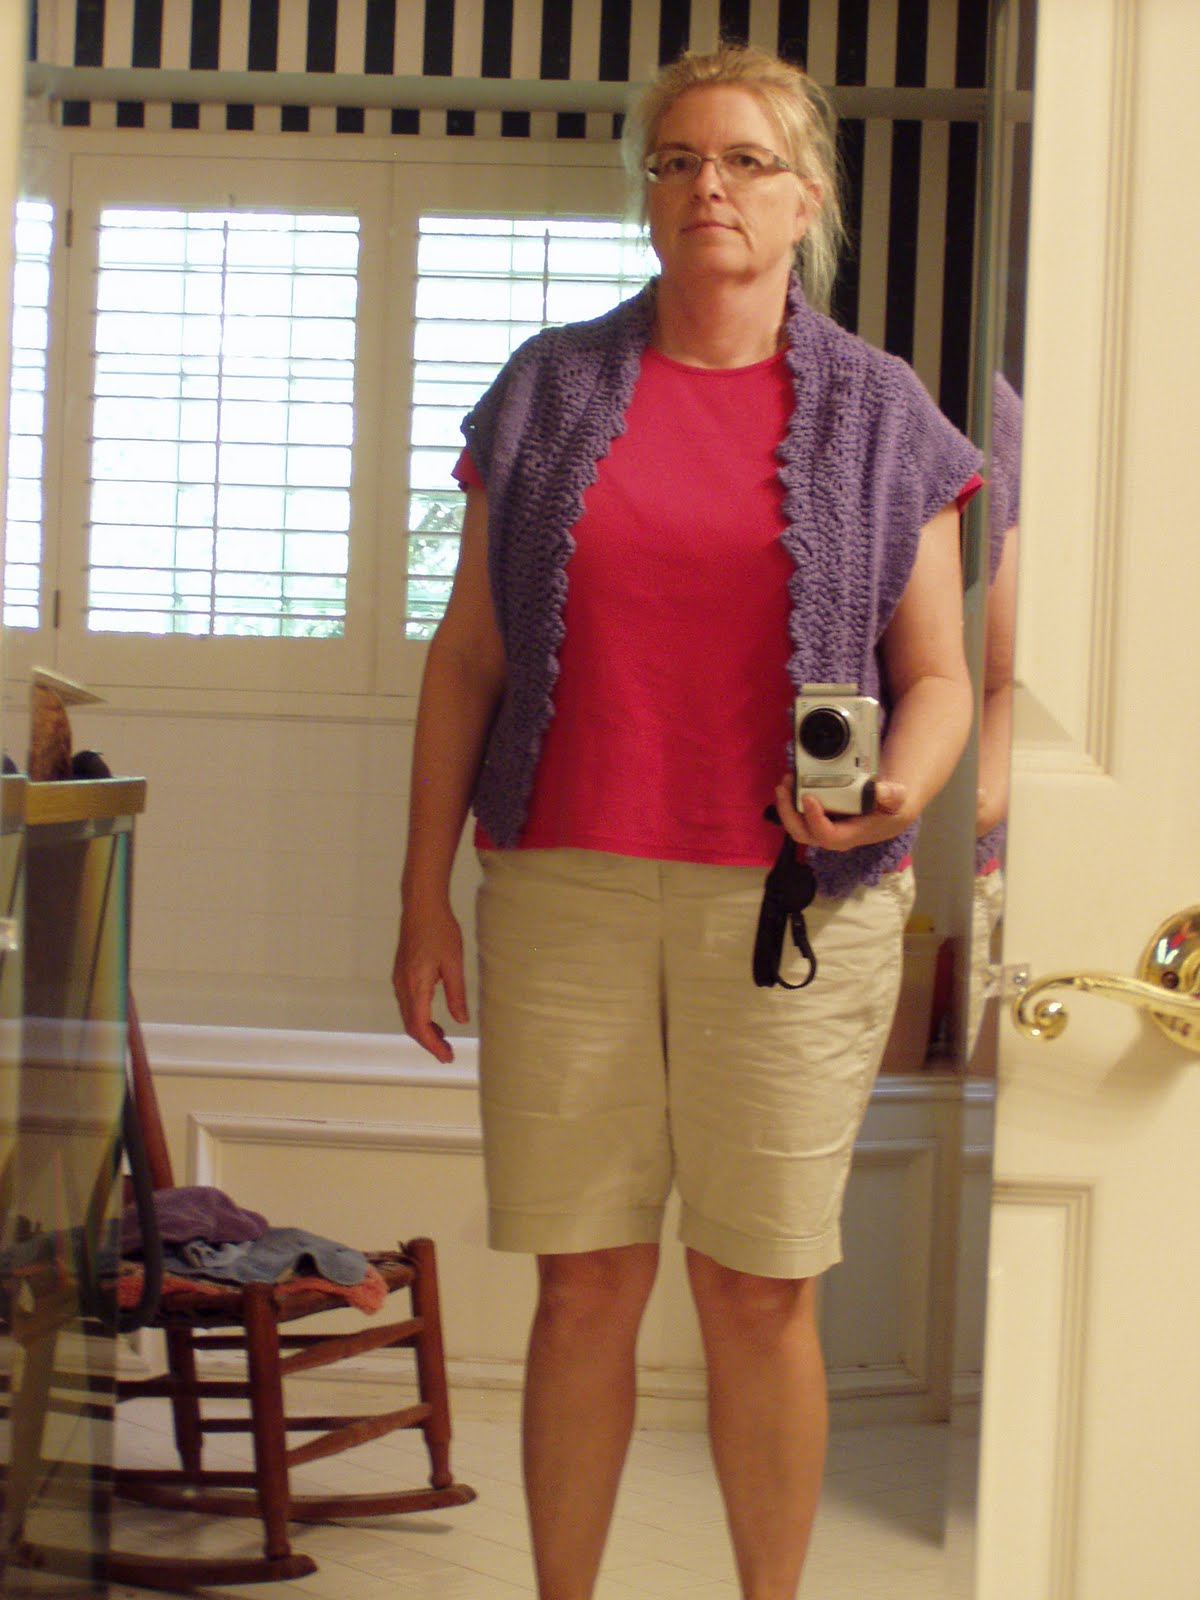
My project was did fairly well in the competition. I had some problems with my write-up but now I understand the process better so I don't expect to have those issues in the future. And my husband has a new addition to his Viking wardrobe.

Monday, August 22, 2011

To-do list

Holy cow! No posts since February? I don't know how my loyal readers have managed without me.

My children start school again in a couple of days, and I have been making a mental list of all the things I plan to accomplish once I have my days free:

  • Clean the whole house
  • Go through all the closets & send mountains of things to Goodwill and Freecycle
  • Paint the woodwork in our bathroom
  • Finish George's Bayeaux Tapestry sheet
  • Make Charlotte another nightgown
  • Weave a couple of dozen scarves
  • Make sock monsters
  • Overhaul our financial accounts
  • Make another set of Viking clothes for each of us
  • Knit that gray cabled sweater
  • Knit Charlotte's ballet wrap
  • Spin, spin, spin
  • Knit a dozen pairs of socks on the CSM
  • Sort my photos
..... and that's just my plans for the first week.

Saturday, February 12, 2011

A day to myself

So yesterday, when I had the house to myself for a day, I decided that what I wanted most to do was to card. I haven't done any carding since before Christmas. That means I can't do any spinning, because the one bobbin on my CPW is half full of the carding project I was working on back in December, and I don't have any more to spin and don't want to wind off the singles and spin something else on it. And I can't spin on the Lendrum because the CPW is in the living room and the sock machine and its associated boxes of tools and yarn are in the family room and swap packages have taken over the dining room and if I pull the Lendrum out and unfold it the whole family might rise as one and say **ENOUGH!!**

So like I said, I wanted to card.

First I had to get to the wool room.


You can see the box of soap-making supplies that has been sitting in front of the door since we made bath bombs for Christmas presents in early December. Through the open door you can see why the soap box hasn't gotten back to its proper spot.


The only reason I've come in here is to throw things into various piles. These are the boxes I pulled out last weekend -- you can see I just shoved them back through the door. Lots of other things have ended up on my carding work table.


So I spent a while sorting and organizing and putting things back in their places. Not too much, though, because I could spend forever in there, and what I really wanted was to card. And I did:


Here's a shot where you can actually see the floor:


It's still crowded, and I've got lots of pink left to process, but I have the space to do it again.

After a lunch break, I made the mate to this knee sock, the one on the right:


I like almost everything about it except the toe. The toe is too big and twists funny so that I am walking on the short row joins and the excess fabric. The sock on the left is a commercial sock; I want to make toes that fit like those ones. The second sock, which I have not yet tried on, has a stubbier toe that I hope will fit better.

Why have I not tried it on yet? Well, after the sock knitting, Me Time was over, and today has been a Not Me Day from the get go. I've helped Charlotte make a teddy bear from a kit she got for Christmas, I've mended holes in t-shirts, sewed badges onto tae kwon do uniforms, made pizza, ferried kids, ridden bikes to the park, watched a family movie, made dinner, read books (separately) to both kids at bedtime, etc., etc., but I haven't tried on a sock. Maybe tomorrow.

Wednesday, February 02, 2011

More socks

I have been spending as much time as I can manage with the autoknitter. The basic operation is not too difficult, although I still have the occasional surprise non-knitting needle (pesky), dropped stitch (peskier) or totally jammed ribber (disastrous). But the real challenge, surprisingly, has been making a sock that fits my foot and that has a dense enough fabric to suit me. I like a nice firm sock fabric and a tight fitting sock; I think both of those make a sock last much longer. And getting the fabric I want from the autoknitter has been more difficult than I expected.

I've made a second pair of socks for myself, using the same yarn as the first, but in a different color. These were knit toe-up, which meant I could make the legs as long as the skein held out. In this case that's almost knee length -- not really high enough to stay up for sure, but warmer than the first pair.


This pair has a ribbed foot -- you can see how much narrower it is than the first, unribbed pair. I like the feeling of it quite a bit and it certainly does hug my high arches. The leg doesn't look much longer than the first pair's, although it's actually an additional 40 rows. Here's another view:


That's more like it. Here you can also see that the foot is longer -- oops. It sure didn't need to be, but I lost count of rows and then made the second sock to match rather than start over.

Both pairs of socks have been through the washer and drier a couple of times. The yarn has softened up and gotten kind of fuzzy but they haven't shrunk much at all. I know that's how they are designed but I would like it if they'd get a little smaller. Perhaps I need to investigate non-superwash yarns.

I've made a few non-sock items -- legwarmers for Charlotte out of thicker yarn, which my ribber didn't much care for, and wristwarmers for Charlotte out of sock yarn (these started out as my first experiments with the ribber). I don't intend to do much more, though, until I've got the sock fabric worked out. I'm just past the toe of a pair made out of Kroy, which I'm hoping will make a denser fabric as it is a thicker yarn. I couldn't face putting in the ribber needles this late at night, though, which is why I'm blogging instead of knitting.

My 30 slot dial arrived from New Zealand and turned out to be completely useless. The metal had swelled -- a known issue with the low-grade pot metal from which they are made -- and the slots are now too small to hold a needle. The seller is going to replace it but I am so disappointed; I was really looking forward to being able to do 1:1 rib. Why? Because it doesn't unravel, so you don't have to do anything to finish the edge. I'll be able to in time, I guess, but not for another few weeks while the crummy dial wends its way back to NZ and then a good one makes the return journey to me. I hope the 80 slot cylinder is in better shape! I'm counting on that to make a nice dense fabric out of regular sock yarns.

The children have been out of school for the past two days and my husband is working from home, all due to the storm that swept through here Monday night/Tuesday morning. They'll all be here tomorrow, too; the university has specifically told people like my husband that they are not allowed to come in even if they are perfectly comfortable driving on icy roads. "Work from home," he was told, which is easier said than done when you are Fun Dad and the kids are home, too.

When I imagine snow days they involve lots of yarn, a fire in the fireplace, and general cozy hanging out. In real life there are a lot more loads of laundry and washing of dishes. I still hope that tomorrow I can make those Kroy socks.

Tuesday, January 25, 2011

My first CSM socks!

Here they are -- the first actual socks I've made on the sock machine. Before these I made a bunch of plain tubes, about a hundred heels, and several ribbed tubes -- all pulled back and reknit over and over.

My, it's hard to take pictures of your own feet. I did want to show the height of the leg on these socks. They come up to mid calf, which is 100 rows of ribbing. I kind of wish I had gone whole hog and made knee socks, but I wasn't sure about the tension. Tension is the bugbear here -- it's hard to know what tension you're getting while the work is on the machine, because there's between 5 & 10 pounds of weight hanging from the bottom of the sock at all times which as you might guess affects stitch size. So you knit, take your tube off the machine & let it relax, then measure & assess & so forth. Really you should wash it, because that's when it really reveals its true nature. But I'm still at such a basic level that I'm skipping those niceties.

So these are okay socks -- acceptable but not fabulous. The tension in the feet is looser than I like, about 7.5 stitches per inch when I would really rather have 8.5 or even 9. I don't think I can get this particular cylinder to knit tighter, so I'm going to throw the socks in the dryer and see if they'll shrink up just a bit.

Also they slouch down a little, which is just what you'd expect for a ribbing that hits at mid-calf. I do wish I'd had the courage of my convictions and had made them with about 150 rows of ribbing. Doing the same thing for another 50 rows is no big deal -- it's changing from one thing to another (say, ribbing to stockinette) that takes time.

Clearly I'm going to buy my sock yarns in batches of 150 g, not 100 g. This is yarn that came along with the machine, and I had 4 skeins (this used two). I suppose I could cut off the leg at the ankle and knit up from there ... or just wear them and move on to the next. Because if I started fiddling with these, I'd have to make the stripe pattern match, and I just don't want to do that.

One CSM knitter said she tends to knit socks in groups of three -- she knits one, figures out what she should have done differently, knits the second that way, then rips out the first and reknits it to match. Others find a favorite yarn or two and work with them over and over again, because they are so predictable.

The surprise with my machine was discovering that the cylinder - ribber combination was not a standard one. Usually your ribber has half as many needle slots as the cylinder, so you can half half the stitches knitting on the cylinder and half purling on the ribber. You can do other combinations as well, such as 2x2 or 1x3 (or 4 or 5), but the 2:1 ratio is pretty standard.

But my machine came with a 60 needle cylinder and a 40 slot ribber. It also came with notes from the previous two owners showing that these are what the (nameless) restorer supplied in the first place. I wonder why? I was fortunate to be able to locate a 30 slot ribber dial for this brand of machine and it is on the way to my house. It's coming from New Zealand, though, so I don't know how long that will take.

Then a couple of days ago I found an 80 slot cylinder on ebay. This would match up with my 40 slot ribber, so I was quite interested. The seller was clearly parting out a machine and had four different cylinders for sale -- it was surprising to see the variation in the selling price between the four. I think I was very lucky since I won the auction for $26 + $24 shipping -- that seems exorbitant but it's coming from Canada. At any rate, $50 seems like a good price for a cylinder; a newly manufactured one that will fit this machine is $235. (Have you noted all the conditional words I'm using -- "I think" "seems like a good price" etc.? I won't really know if this is a good deal until it arrives and I can assess its condition. But $50 seems like a reasonable gamble to me.)

My current project on the machine is a pair of legwarmers for Charlotte to wear over her ballet tights. I am using a sport weight craft store acrylic and I guess am following the 3-for-a-pair model -- I made one to figure out how long to make it and where to set the tension, and have made the second which I think is a keeper. I hope to do the third today, but not if I don't get off the computer!

Thursday, January 13, 2011

Another new toy!

Look what's in my living room:


Two darling kittens! Oh, and also a circular sock machine ....

Pardon me while I go make another dozen practice heels. I think I've made one perfect one so far, and only one that sort of exploded and fell completely off the machine. The rest have been somewhere in the middle.

Wednesday, November 24, 2010

Hold onto your hat, Martha, we're going to town!

There's a new spinning wheel at my house -- new to me, anyways. This is my Canadian Production Wheel (CPW), made in Quebec around 1920, give or take 20 years.


It's huge (that's my Lendrum behind it), with a 29" drive wheel (the Lendrum's is 18"). It doesn't have the versatility of the Lendrum, but it should help me spin fine-to-medium, smooth-to-slightly-slubby yarn extremely quickly. That's what it was designed to do -- these wheels were for women spinning for income, and there was quite a little industry producing them.

I became intrigued by these wheels a while back, and started thinking about them more and more. There's an online discussion group for them, which just added fuel to the fire. A couple of months ago one turned up on Craigslist up in Edmond, but by the time I had noticed it, it had been sold -- to someone else in that group. You've got to move fast, I realized.

Many of the wheels that people find need a lot of rehabbing, which is not what I wanted. So I was really excited to see on Craigslist that looked good, was reasonably priced, and was only about half an hour away. I emailed the seller and made an appointment for the next morning; by lunch time it was in my living room.

It's in very good shape, considering. The seller had it for decor only; it had come from an antique show in Minnesota about 10 years ago. It has obviously seen a lot of use at one time (oil stains) but probably hadn't spun in decades.

There's some damage to the wheel rim, but nothing that will affect spinning:


And the footman is wonky; I'm still bending it in different ways to get it to the right height and to try and resolve a click:


The flyer assembly was the only real source of trouble. It looks great:


but the bobbin and flyer would barely turn independently due to decades of solidified gunk inside. I spent Monday evening cleaning the bobbin out with alcohol & q-tips, and polishing the flyer shaft with steel wool. I thought I had done a pretty good job, but it still jammed going back on:


Not good. If the bobbin doesn't rotate freely on the flyer, your yarn won't wind on. So I did some reading Monday night & Tuesday morning, and got a lot of helpful advice from the Ravelry CPW Lover's group, before I turned my attention to preparing for house guests. I picked up a few supplies on my way to get the kids after school, and Tuesday night I polished the shaft with a hand drill and some Turtle Wax car polishing compound, using the bobbin as a polishing tool. (CPW bobbins have metal bushings, so they can take this. Most don't, and couldn't.)

Then I reassembled the wheel, oiled everything with high-viscosity gun oil (another afternoon purchase) and ....


... started spinning. It's a blast! I haven't cleaned out the metal bits you see below the flyer, so I can't control the tension with any finesse. It's either too-light-to-spin or 20-mule-team, not much in between. So this yarn is hardly my best, or even my usual. But I foresee a lovely future with this wheel, turning the pile of fleeces in the garage into yarn.

Monday, November 15, 2010

Assessing fit

As it turns out, once I counted stitches and rows I realized I had shaped the front piece exactly the same as the back. I think the difference in the way they looked comes partly from the bust shaping, and partly from the greater weight-per-stitch of the hem on the narrower front piece. Blocking helped a lot. So I knitted up the right front. (Actually, first I knitted up a second left front, but with buttonholes. Then I ripped that out and knitted the right right front.)

I whipped up a sleeve to see if there was enough yarn to make the whole sweater one color (there is) and to test my ability to draft a set-in sleeve on the first try (not there yet). The armhole is deeper than I intended -- it turns out my gauge is just slightly different from what I expected -- and I am not willing to reknit the sweater to make it higher. Although I don't know why not, really. Will have to sleep on this.

Anyways, I basted the whole thing together today, and realized that the sleeve is too big. So I pinched out the amount that seemed appropriate and rebasted. What do you think? (Funny pucker in the middle of the back is just wonky basting. Peculiar expression on my face is nearsighted attempts to aim camera. Wallpaper is unspeakable.)


It's still pretty big, but the whole sweater is roomy, and I think if I tighten the arm up any more it would look peculiar. Other than the low armhole and a bit of residual hem flip, I think it looks pretty good. Or should I rip out all three body pieces and redo them with a higher armhole? I don't think this sweater deserves that much fuss, really; if I just finish it off the way it is I'll have a nice, warm, well-enough fitting sweater. And given the fact that fall has finally arrived in Oklahoma, I'm eager to have this done and ready to wear.

Friday, November 12, 2010

A slight problem.


The sweater has been progressing -- not at quite the pace of day 1, but pretty fast. I finished the first half of the front yesterday (Thursday) after dinner and was quite pleased until I realized that the front was much longer than the back. This worried and confused me, since my plan for the front was basically "knit half a back, only with bust darts, a lower neck, and a front facing." How could that go wrong?

I did actually write out a pattern for the front, complete with row numbers, although the bust darts make those all wonky. It did seem while knitting that there was a long stretch between the end of the armhole shaping and the beginning of the neck shaping, and then really quite a bit of space between the end of the neck shaping and the start of the shoulder shaping. So I thought I should probably just rip out a enough rows to match and then redo the shoulder shaping.

I had gone so far as to take out the bindoff and rip back a couple of rows before I remembered that machine knit fabric needs time to assume its final form after coming off the needles. The weights that make knitting possible also stretch the fabric. So I set the piece aside to wait for morning, sure that all would be well.

In the morning, although the front was still too long, I was glad I hadn't gone any further. I don't have a good track record with sweater revision concepts developed after 10 p.m., and just whacking off a chunk of the shoulder seemed, in retrospect, to be a bit chancy. So I counted rows between the end of armscye decreases and the beginning of shoulder shaping, and was stunned to find that they are the same on both pieces.

That was as far as I could get before breakfast, and afterwards the day was eaten up with teacher conferences, errands, and kid wrangling. They had the day off school but my husband was at work, so the opportunities to sit and think about pattern issues really never came.

I did manage to knit the second front up to the start of the bust darts, since I'm pretty confident all is well up to that point. Then I pinned out the first front and the back to look at them again:


And now I noticed something that completely escaped me before, who knows how: the armscye shaping isn't the same. I think my extra length might be all right there, in the more gradual slope on the front. My row gauge is 6 rpi, so a couple of extra rows makes a big difference.

I think, then, that I will have to rip back to the armscye and make the pieces match. I'm not sure at this point which decrease curve matches my original instructions -- and since it's long after 10 now I think I had better wait until morning to figure it out.

Wednesday, November 10, 2010

A day's work

Last week it dawned on me that yet another winter (or at least the Oklahoma approximation thereof) is on its way and my grey cabled cardigan is still a goal rather than something I can wear to keep warm. Rather than beat myself up over this, I decided to make a sweater on my knitting machine -- something nice and cozy, something that will keep me warm and be fun to wear, but that won't take up too much of my project time.

I decided to use some yarn that was given to me back when I lived in Michigan. I was told it was handspun but I'm not sure about that. If not handspun, it might be small-farm spun. It's a fairly coarse wool with more bits of hay than strictly necessary, in a nice dark sheep's brown. It's a heavy worsted two-ply that knits up at 4 stitches to the inch. It would make a lovely jacket if I had two more skeins of it. Because I don't, I've done nothing with it for about 14 years. There's plenty for a nice vest, but the yarn is too coarse and too heavy for a vest. What to do? Last week I suddenly thought of Scandinavian women's wadmal jackets with knitted sleeves. I'd make a solid colored body and completely different sleeves.

I retrieved the yarn from its storage location -- inside an old picnic basket in the garage. This turned out to be a less than ideal storage site; at some point insects have been having their way with the yarn, though half-heartedly. I could only find two spots that looked chewed on, so I washed it up and hoped for the best. Then I waited until today -- Wednesday is my least-scheduled day.

My day in pictures:

6:30 a.m . : looking at inspirational pictures:


9 a.m. : time to get started. It helps that years ago I made a large swatch marked with key plate sizes:


10 a.m. : pattern for the back has been written:


10:45 a.m. : yarn has been wound (also, dishes done, beds made, cats fed, etc.):

You can see how much debris flew off in the winding. One skein ended up in five small balls but the rest seemed pretty sound. The proof is in the knitting, though.

It took me a while to find all the bits of the machine and get things set up. I started knitting around 11:30, then spent about an hour doing a hem because I really like a purl folding row. A picot hem is much faster but seemed inappropriate for this project.

2:30 p.m. : by the time I had to go get the kids; I was up to the armholes. After school we went to the library but did get home in time for me to knit a little more before dinner. This picture is at about 6 p.m.:


8 p.m. : after dinner I finished the back. Just as I was finishing the bindoff, Charlotte came out to investigate and fell in love with the claw weights:

She spent about 20 minutes moving them here and there! After she went to bed, I took the back off the machine:

So here's the back. I am bothered by the way the hem flips up, and there's a break in the yarn that needs to be darned, but all in all it looks pretty good. I didn't expect it to take me 12 hours, but still -- a good day's work.

Tomorrow: the fronts. I wish I had the energy to write out the bust darts tonight, but I'll be lucky if I can stay awake long enough to do the dishes.

Friday, October 22, 2010

Ballet wrap yarn samples

I've been sampling for my proposed ballet wrap.

First I dyed fiber. I looked through books of color samples and decided on a pastel pink with a little bit of black to tone it down. Unfortunately I didn't check my calculations carefully enough, so I dyed it at 1% DOS when I had intended to dye at .1%. Just a simple decimal point, but oh, the difference! You can see the oh-so-vibrant results here:


This was all in the same dyepot. Clockwise from upper right: Superwash merino wool, tussah silk that was interleaved with superwash, merino wool (not superwash), angora, tussah silk that was interleaved with the regular merino. You can see that the superwash merino took the dye more readily than the regular merino -- that's to be expected, since the superwash process removes the little scales protecting the outside of the wool fibers. I thought it was interesting to see the difference in the silk as well, since they are both the same fiber from the same coil of top.

This was my first attempt at dyeing silk interleaved with wool as described by Deb Menz in Color in Spinning. (Why, yes, I've had the book for 12 years. I'm slow.) I'm not sure I like the final results -- it was pesky to do, and the silk is in a thousand bits right now -- but I need to try it a few more times before deciding if it works for me.

Even though this is not the depth of shade I wanted, the basic color is what I had in mind. So I decided to concentrate on developing a blend of fibers before worrying about the color. So I carded up a batt of each fiber and went to work.


I decided not to use the superwash since it was so much darker. I made blends of merino / angora and two different proportions of merino / angora / silk.


Then I spun them up and knitted them, and showed them around to friends.

The merino / angora (center nest) had the highest percentage of angora, and we liked that. But it has a matt surface; I liked the shine that the silk gave to the other two samples.

So I decided to try another blend of equal parts of merino / silk / angora, and to start fiddling with the color. I'm very happy with the fiber blend, but not so much with the color change. I thought that if half the angora were gray, the whole thing would get a sort of silvery sheen. Instead it just looked dirty. It is starting to match Charlotte's ballet leotard, but that's not necessarily a good thing. I hate that color!

(Swatches start at the bottom with merino / angora. Then two merino / angora / silk blends, with a lower percentage of angora. The light swatch in the middle has the gray angora.)

Then I made two more blends. I blended the pink superwash with black wool from a local fleece -- considered medium by the breeder, who specializes in Merino, but which feels pretty soft to me. I then blended the pink/black wool with white superwash merino, and blended that whole mixture with the silk & angora. I made a second version of this blend in which half the angora was pink and half was white.

I fully expected to love these last two yarns, and especially the lighter one. Unfortunately, the black wool makes the whole thing look dirty again, although for a different reason than the angora. With the angora, I think the grubby effect comes from the gray haze over the clearer color of the base knitting. With the black wool, I think it's just uneven blending. Because the black wool is so much darker than the pink, even three passes through the supercard wasn't enough to thoroughly blend it and eliminate streaking.

So today I'm going to make another couple of blends. First will be pink wool / white wool / silk / pink angora / white angora, with the proportions of both whites upped, to make a pale pink. Second will have some camel blended in, to brown it up a little. I don't think there will be as much trouble blending this because the values are similar.

I know this is a lot of trouble for the yarn for one little cardigan. But I'm finding it very educational, and fun if also frustrating. And I'm planning a nifty scarf out of all the little balls of leftover yarn -- I've knit up less than half of each sample.

To the wool room! It's carding time!

Wednesday, September 29, 2010

Little girl fashion HELP

Hey, there --

I am planning a sweater for my six year old and realize that it would be more likely to turn out well if I were not so fashion-oblivious. I have in mind something like this - a v-necked wrap around, probably with elbow or 3/4 length sleeves. I want to make it in pink, out of an angora/silk/wool blend yarn, so it will be fluffy and make her feel like a ballet princess.

So far, so good. But the details have me stumped. I see a lot of variation in how these things fasten. Some (the traditional ones, I think) have ties on each end and holes in the side seam to thread them through; they tie in back or have long ties that wrap all the way around and tie in front. Some have little short ties on the left hip; closure on the other side is not visible but presumably is either short ties on the inside or a button. Some have a button on the right side. One was a sort of false wrap -- the two fronts were fastened to the same bottom band, so the sweater was really a pullover.

So how important is the wrapping function to make this feel like a Real Ballet Sweater? I think the long ties might be so cumbersome that she wouldn't like the sweater -- though she does like to tie bows. Buttons wouldn't allow for the same amount of customization -- will that matter to a first grader? I don't think she'd like the pullover as well as a wrap.

And what of the length? The Sirdar pattern shows it as waist length, but I wonder if slightly shorter wouldn't be more fashionable now. Though of course if it's waist length now it will be higher by next winter, more of this effect.

And what about stitch pattern? I love this eyelet patterned one (Rav link) but all the capezio type sweaters are plain. Will she know? Care?

I've promised myself I won't start this until I finish my current spinning project, but that will probably only be a few days. So help me think this through!

Sunday, September 12, 2010

Finished shawl, with pride.

I finally finished my Pi Are Squared shawl! I can't remember when I first decided to make this, but I think it was while I was living in Chicago which means before 1989. (Coincidentally, I bought this yarn while living in Chicago, too.) I cast this on in July or August 2005, for something to knit while taking a long car ride. It has lasted me through many of them, but it is finally done.

My biggest holdup has been the final edging around the neck/front opening. I started making an applied I-cord edging but didn't like it, and ripped it back in favor of a very plain, very simple single crochet edge. I might put something fancier on later, but I doubt it -- there's enough going on everywhere else.

Here it is blocking:


I just used t-pins stuck into the carpet. I should have vacuumed first; I had to pick quite a few fuzzy bits off the back after it dried. See the tape measure in the middle? I used that to make both sides approximately the same.

Here it is from another angle:


Note the fan in the background? That's because my final impetus to finish was the local county fair -- I pinned this out at 2 in the afternoon and entries were due by 9 p.m. It was dry in plenty of time.

I don't know where the time goes. I decided in early summer that I would finish this in time for the fair this year, and I never really lost sight of that .... but I still ended up weaving in ends up until the last minute (after blocking; you can see some loose ends here). But I love going to the fair and looking at others people's items, so I always try to enter a few myself.

I tell myself that I don't really care if I win or not but it turns out I lie. Because this didn't win ANYTHING and I was really, really grouchy about it. I know it's hardly a masterpiece of design but I think it's quite nice and it is also a huge honking piece of lace. Given our bizarre classes it had to go into the "knitted coats, sweaters and capes" class, and it lost out to a couple of sweaters that really didn't seem all that special to me. But maybe that's my bitterness talking.

Really, I don't think I'd mind nearly as much if there were any explanations at all. There are never any comments on the judging, plus they don't reclass if they think you've entered something in the wrong class. (I think third place in this class went to a baby sweater which IMO should have been in the baby sweater class.) I want to know if the judges really thought this wasn't as well done as the items that placed, or if there was some other reason for their decisions, or (honestly) if they ever even unfolded it.

I also entered a couple of scarves -- knitted and woven -- and a skein of handspun which had to go into "any other crafts". Both scarves placed but they're nothing special.

I do have to say that the woman who knit the winning sweater was there when I was, and she was really really excited and proud, and also seemed to be thrilled with the small cash prize that goes with the ribbon. So that's pretty neat. I'll try to think about that and not about my (apparently wildly overinflated) expectations.

Modeled shots next week, after I reclaim it and bribe my photographer.

Wednesday, August 25, 2010

Styling help!

Hey -- I have a Completed Knitted Garment to show you!!! Now if I could figure out how to wear it ...


This is Watershed, which I planned to finish before our trip to Colorado, so I would have a nice little coverup for those cold mountain evenings. Needless to say, I knitted it while in Colorado, and it did indeed keep my lap warm on those cool evenings.

All is not lost, however -- I will be going to the library this afternoon, where the temperature will be about 20 degrees cooler than the outside air. Usually it's about 30 degrees cooler, but we are having a rare spell of moderate weather, so the outdoors is not as furnace-like as usual.

But how shall I wear it? Specifically, would you leave the collar flat, as in the above picture and this next one?


Or would you fold it over?


I like them both.

We have had Big Changes around here:


These guys were about 5 weeks old at that point. Unfortunately the smallest one (in the middle here) died overnight. We were all shocked and saddened, and fearful for the others. But they have been fine -- energetic, healthy, and eating well. It just doesn't make sense.

And now I must go give the remaining two baths (fleas) -- wish me luck!

Wednesday, June 16, 2010

Summer cardi

My eye has yet again been caught by a summer cardigan, this time by Watershed. I like the way the fronts are designed to hang open, although I think I'd like the back a little longer -- probably to my natural waist.

The problem, though, is that I don't really have any appropriate aran weight yarn. I am swatching with La Laine, but it's really a light worsted and I can't imagine making it stretch to 4 st/in. But I have an enormous amount of yarn in the house & I don't really want to buy something new.

At the same time, I'm wondering why the designer and almost all projects on ravelry call for woolly yarns. I want to wear this in the heat of summer, over tank tops & dresses. Stores and restaurants are kept at meat locker temperatures around here (in summer; in winter they are overheated) so I need a little sweater but I am imagining a wool one feeling hairy and sticky. I'm thinking maybe Cotton Fleece, except that it's a worsted weight, too. (And of course, I don't own any.) What if I rewrite the pattern for 5 st/in? And make it longer? And change the yarn? And maybe the lace stitch? Hmmm.

Friday, May 07, 2010

colors

Well. Here's the two rovings, plied. Pretty, but browner than I really expected.


Although here it is on a sheep brown, and it does make a nice contrast:


Years ago I fell in love with the colors of paint on a bridge on the University of Minnesota campus -- the school maroon, but very weathered & sunbeaten. This reminds me of that bridge (in a good way) but it's not at all what I was setting out to make.

I make a quick additional roving of turquoise, fuchsia, hot pink & bright blue, and spun that along with the second roving, then plied it with the original roving:


It's certainly perkier but maybe too much so. This is the second yarn with the same sheep brown. I think those blue bits are too bright.


I wish I had enough free time to wallow in sampling. Right now it's just making me grumpy. And tomorrow I will be going to the only fleece fair I'm likely to attend this year, so if I want to be looking for something in particular I need to know what it is!

My daughter has just learned to tie her shoelaces (so I will buy her a pair of Sketcher Twinkletoes) and wants me to make a video of it. How can I turn that down? But I want to fool around with wool, too. Here's hoping the responsible mama side of me wins.

Monday, May 03, 2010

update

I've been carding the supplement to the fabulous-but-limited roving.


The largest bump is the original roving. Below it are two items I pulled from stash that I have been carding together to produce rovings like the two smaller ones. One has an outer layer of purple, the other of red, but both are a mix of approximately one part purple to two parts red.

You can see that the original roving is much brighter. My plan is to spin the two rovings (old & new) separately and ply them together. That will give me about 24 ounces of sportweight yarn.

But is the new roving too dull? I am about halfway through carding, and I don't want to recard & get it too blended -- this is one pass through the supercarder and I think another pass would give me very bland results. I could make another thin roving, though, and hold it together with the new roving while spinning. Hmmm. Or maybe this is just fine as it is.

I think a few more samples are in order.

Tuesday, April 27, 2010

Two by two

Things seem to be lining up neatly around here:

Two spinning projects:
gray Corrie/Churro fleece
red/purple roving

Two knitting projects:
purple Pi Are Square shawl
blue & white socks

Two beading projects:
flowery t-shirt
seed bead necklace

Two weaving projects:
overshot on the Baby Wolf that has been untouched since early November
sampler band in doubleweave tablet weaving

Oh, and
TWO children
TWO stories to the house now
and
TOO MUCH to do!

Thursday, April 08, 2010

Matching?

As I've thought about the roving I wrote about yesterday, I remembered another fiber that has been languishing in my stash. This is the one on the spindle below; on the bobbin is yesterday's fiber:


It's a dark picture, but you can see that the spindle fiber is more orangey while the bobbin fiber has more purple.

Here's a picture with fill flash. Surprisingly the colors are fairly accurate:


I could use one fiber for one ply and one for a second. I could recard the spindle fiber with some purple, then use it for a second ply. I could spin them separately but use them in the same sweater -- this is my least favorite option because the bobbin yarn is so much more beautiful, with all its different shades. At the same time, I don't want to dilute its splendor by plying it with something too mundane. But I think I'd really like to have enough yarn for something like the Giant Latvian Mitten cardigan (rav link).

Must run to the grocery store before it's time to get the children -- but wanted to get this up so I can get the opinion of those of you on the other side of the world. Would you keep yesterday's fiber pure? Ply them together? Modify the spindle fiber, then ply?

Tuesday, April 06, 2010

New spinning project

Last Saturday I went to a craft night at a friend's house & couldn't bear to take the same old pair of socks I've been hauling around everywhere. So I packed up my wheel and grabbed some fiber that has been calling to me. Not that I've responded all that quickly -- I actually bought this about two years ago from my friend Twosheep:


Here it is in my front garden. The many shades & tones make me swoon with delight. It's the perfect companion to the endless bumps of gray that I've been spinning this winter.

(If you follow her links you can see it in many earlier stages as well. She dyed gray/brown fleece in purple and red-orange, then had it carded together. Lovely!)

I am loving this, even though I do have to pick out a bunch of neps. (I think Twosheep was right & they are weak tips. That makes me feel better about the endless trimming of tips for my gray sweater project.) It's spinning up quickly and I am daydreaming about potential uses. I only have 12 ounces, so it can't be a sweater on its own. But I want it to be something that I can wear a lot because I love it so. I'm thinking colorwork, maybe on a black background? deep blue? I don't think I have enough to make the Giant Latvian Mitten cardigan. I don't think I want a yoke sweater because they don't really flatter my shape. I have about 9 ounces of pondering to go.

The only fly in the ointment is a shortage of bobbins for my woolee winder. I have four, on the theory that I never make more than a three ply, so this gives me three & one for plying. In reality I often ply on the big head of my Lendrum, which leaves me with an extra WW bobbin, now almost full of this roving. I think I need to spin enough gray to be worth plying, then I can have one empty bobbin for this wool, ply the two together, spin more gray, etc., etc. I'd order another bobbin but I think Nathan Lee is still catching up after the fire. Oh, what a pleasant fix to find myself in.